I recently noticed that a lot of my peers and fellow photographer friends are looking into Capture One. Since Adobe released their newest update to their photo editing software Lightroom. People seem to be very upset about the direction Adobe is going with their subscription based approach. So there is where Capture One comes into play. This software was developed by the camera maker Phase One and was mainly a software for photographers with a medium format camera. But I see more and more photographers using Capture One as their main editing software. So I thought let’s make a tutorial on how to achieve the same look you would create in Lightroom.
So first off I want to mention that there will be no “one-click-makes-an-image-great” tutorial. I will show you the process on how I approach editing in Capture One. Also I am not an expert. There are a ton of other more experienced Capture One users, who might disagree with the way on how I edit images or might have better tips and tricks (if so, please feel free to leave a comment so we all can learn from your expertise). That said let’s dive into the good stuff.
Get started with Capture One
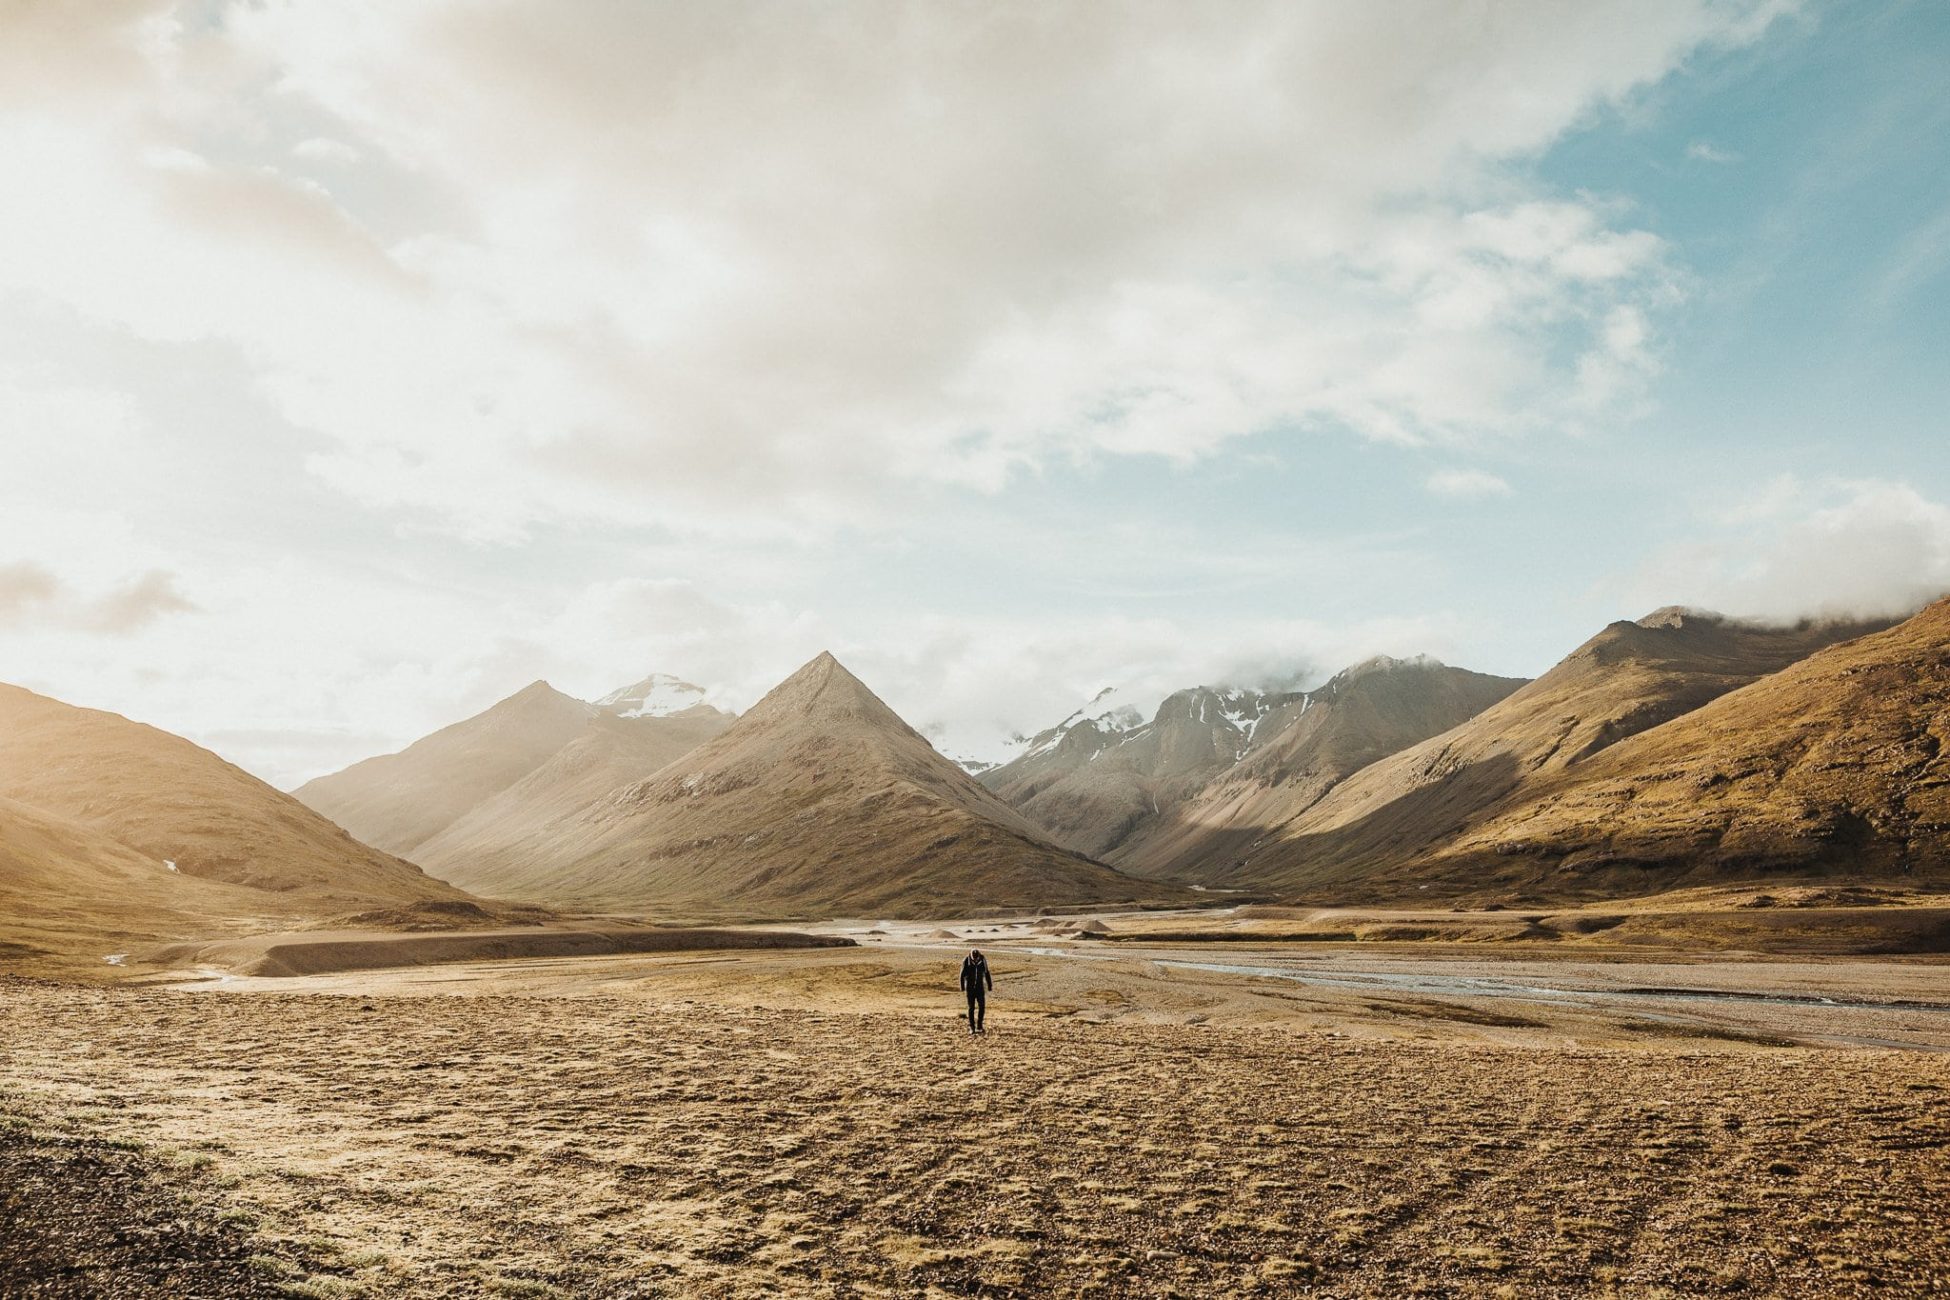
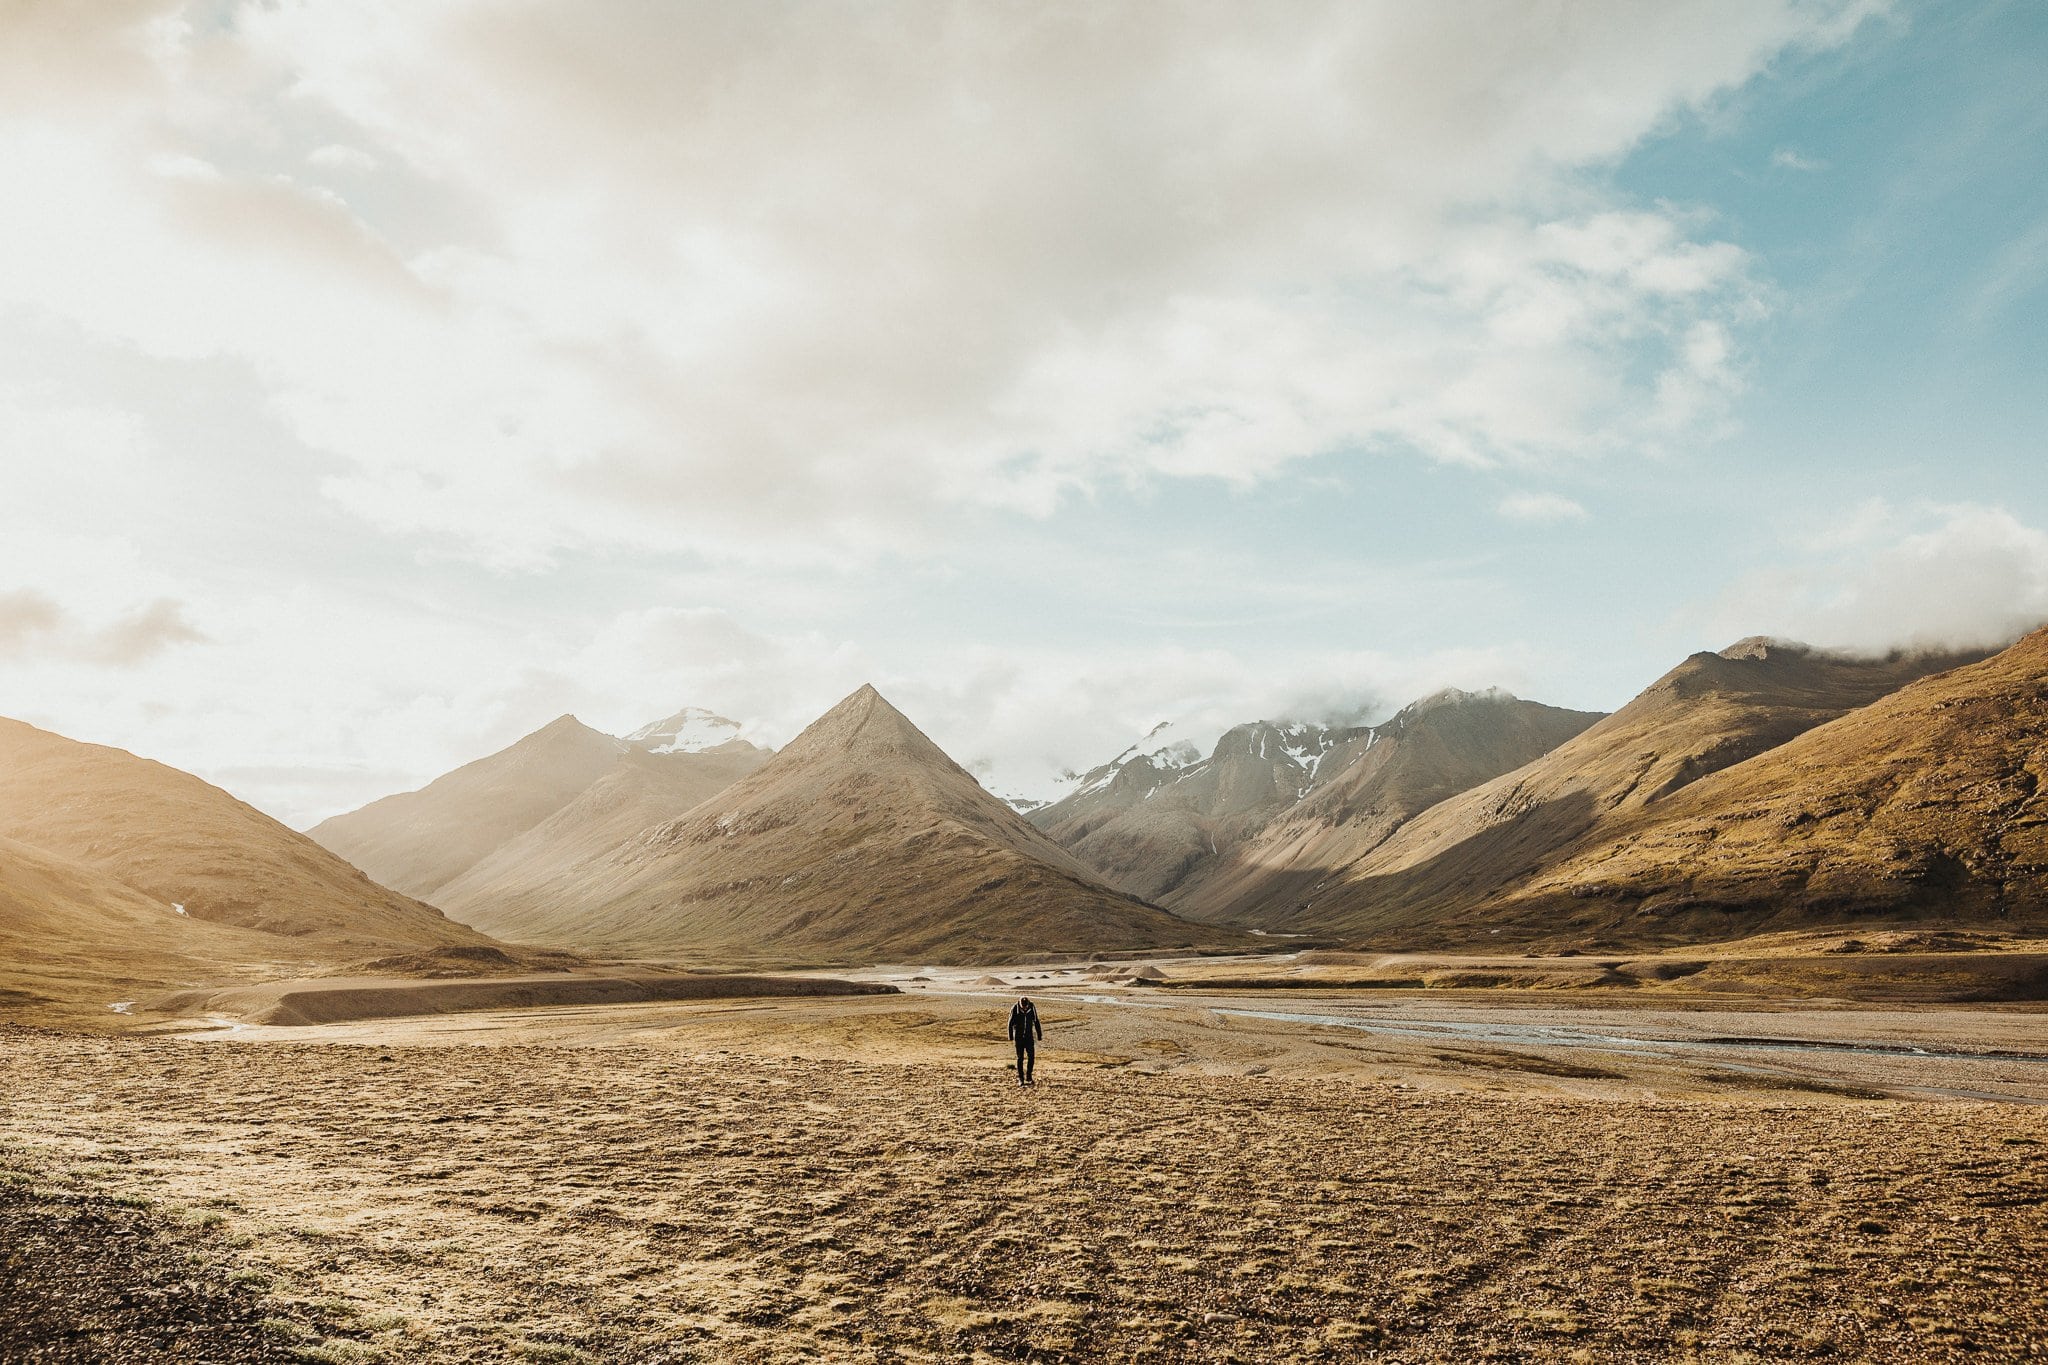
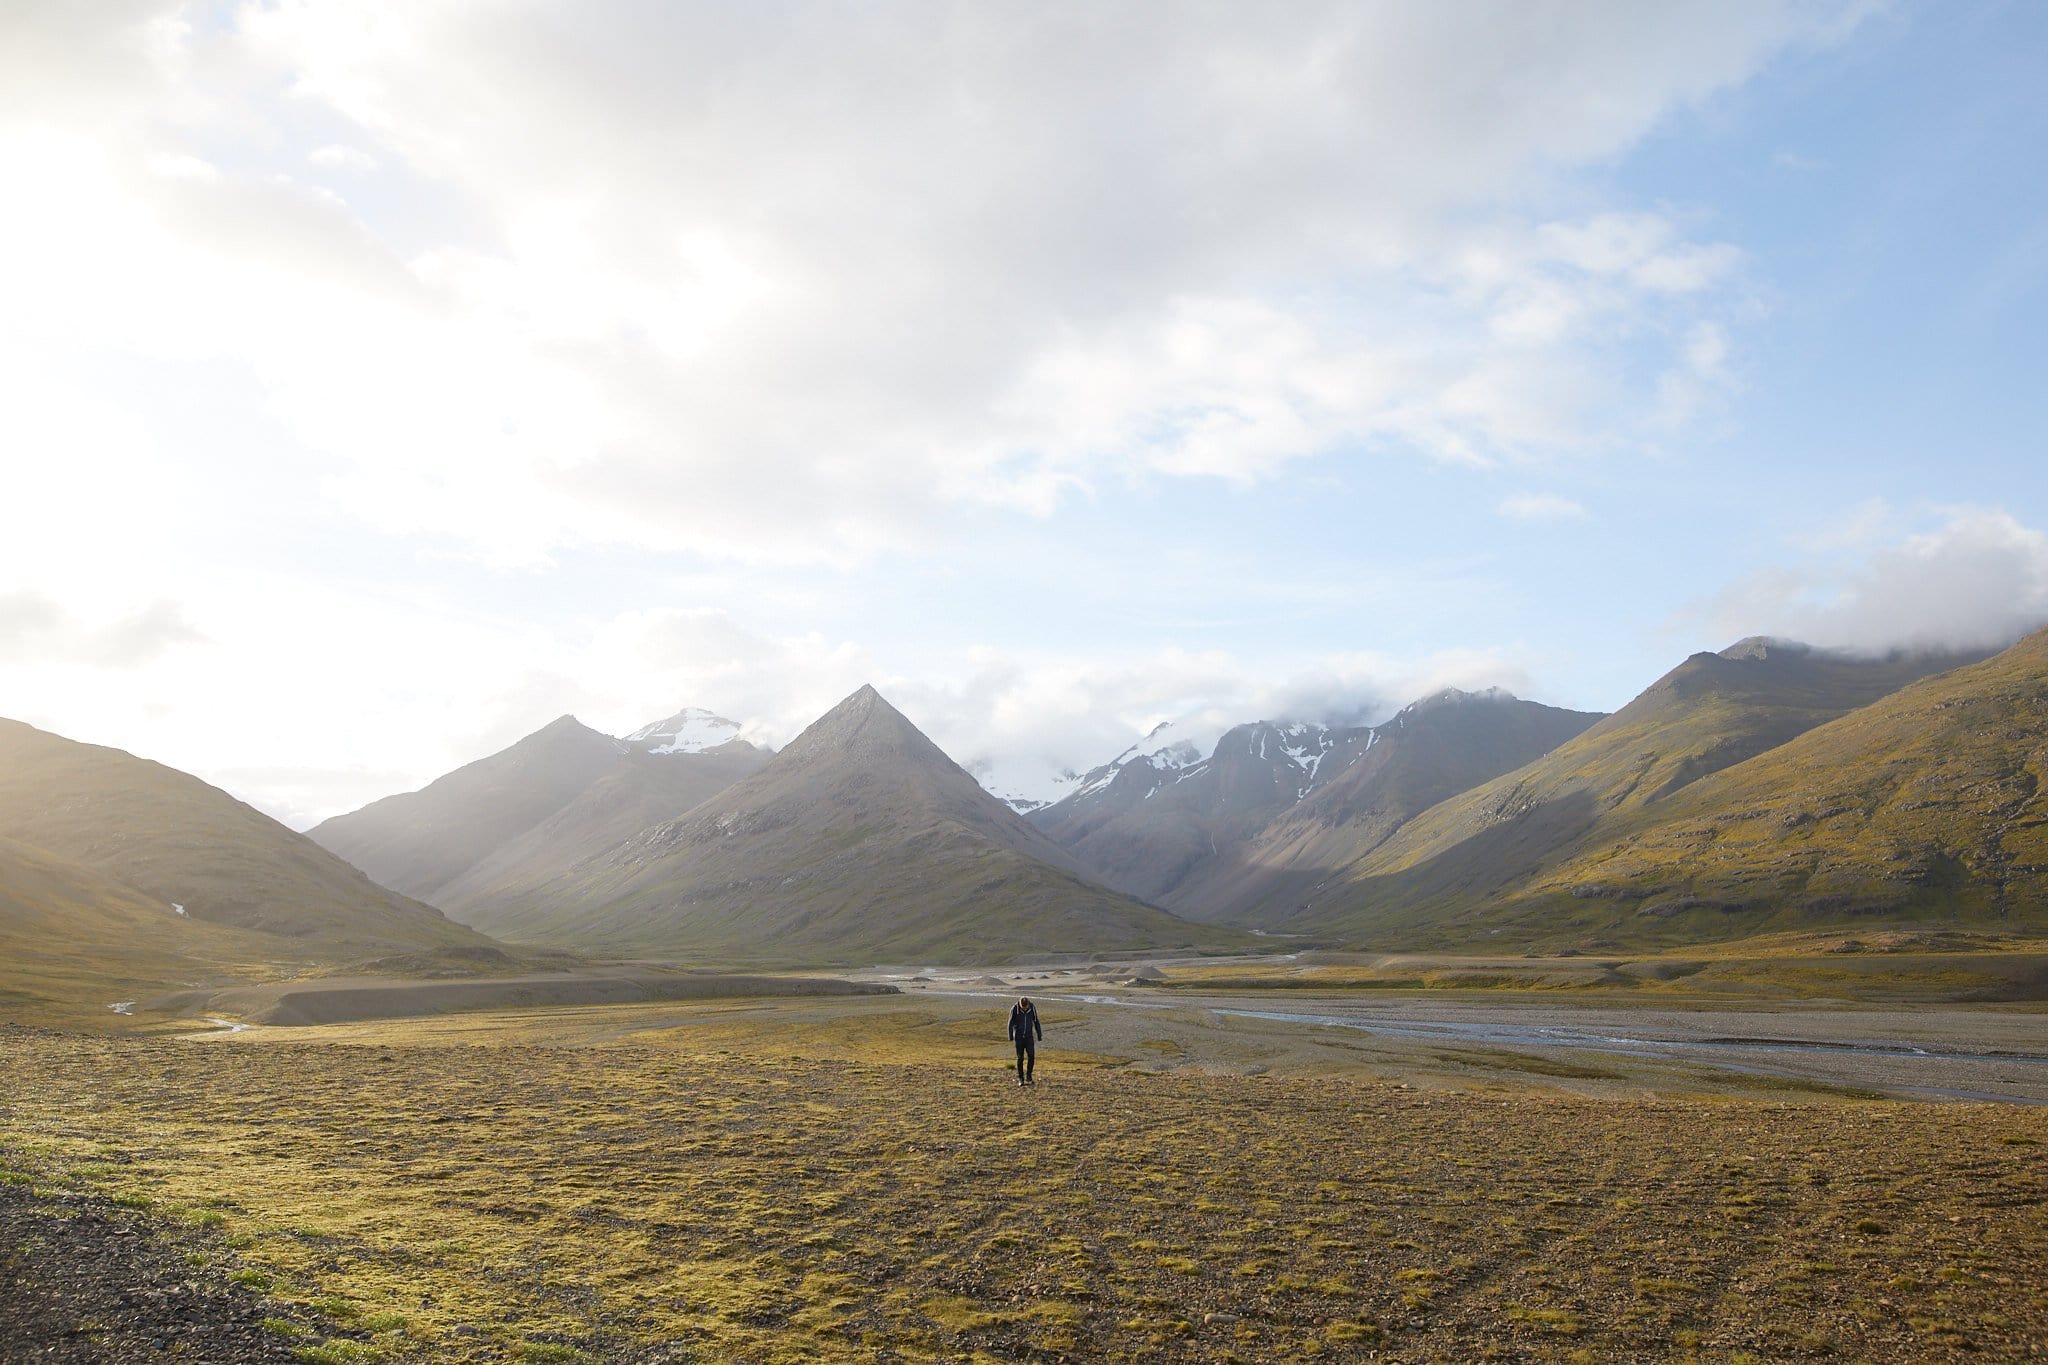
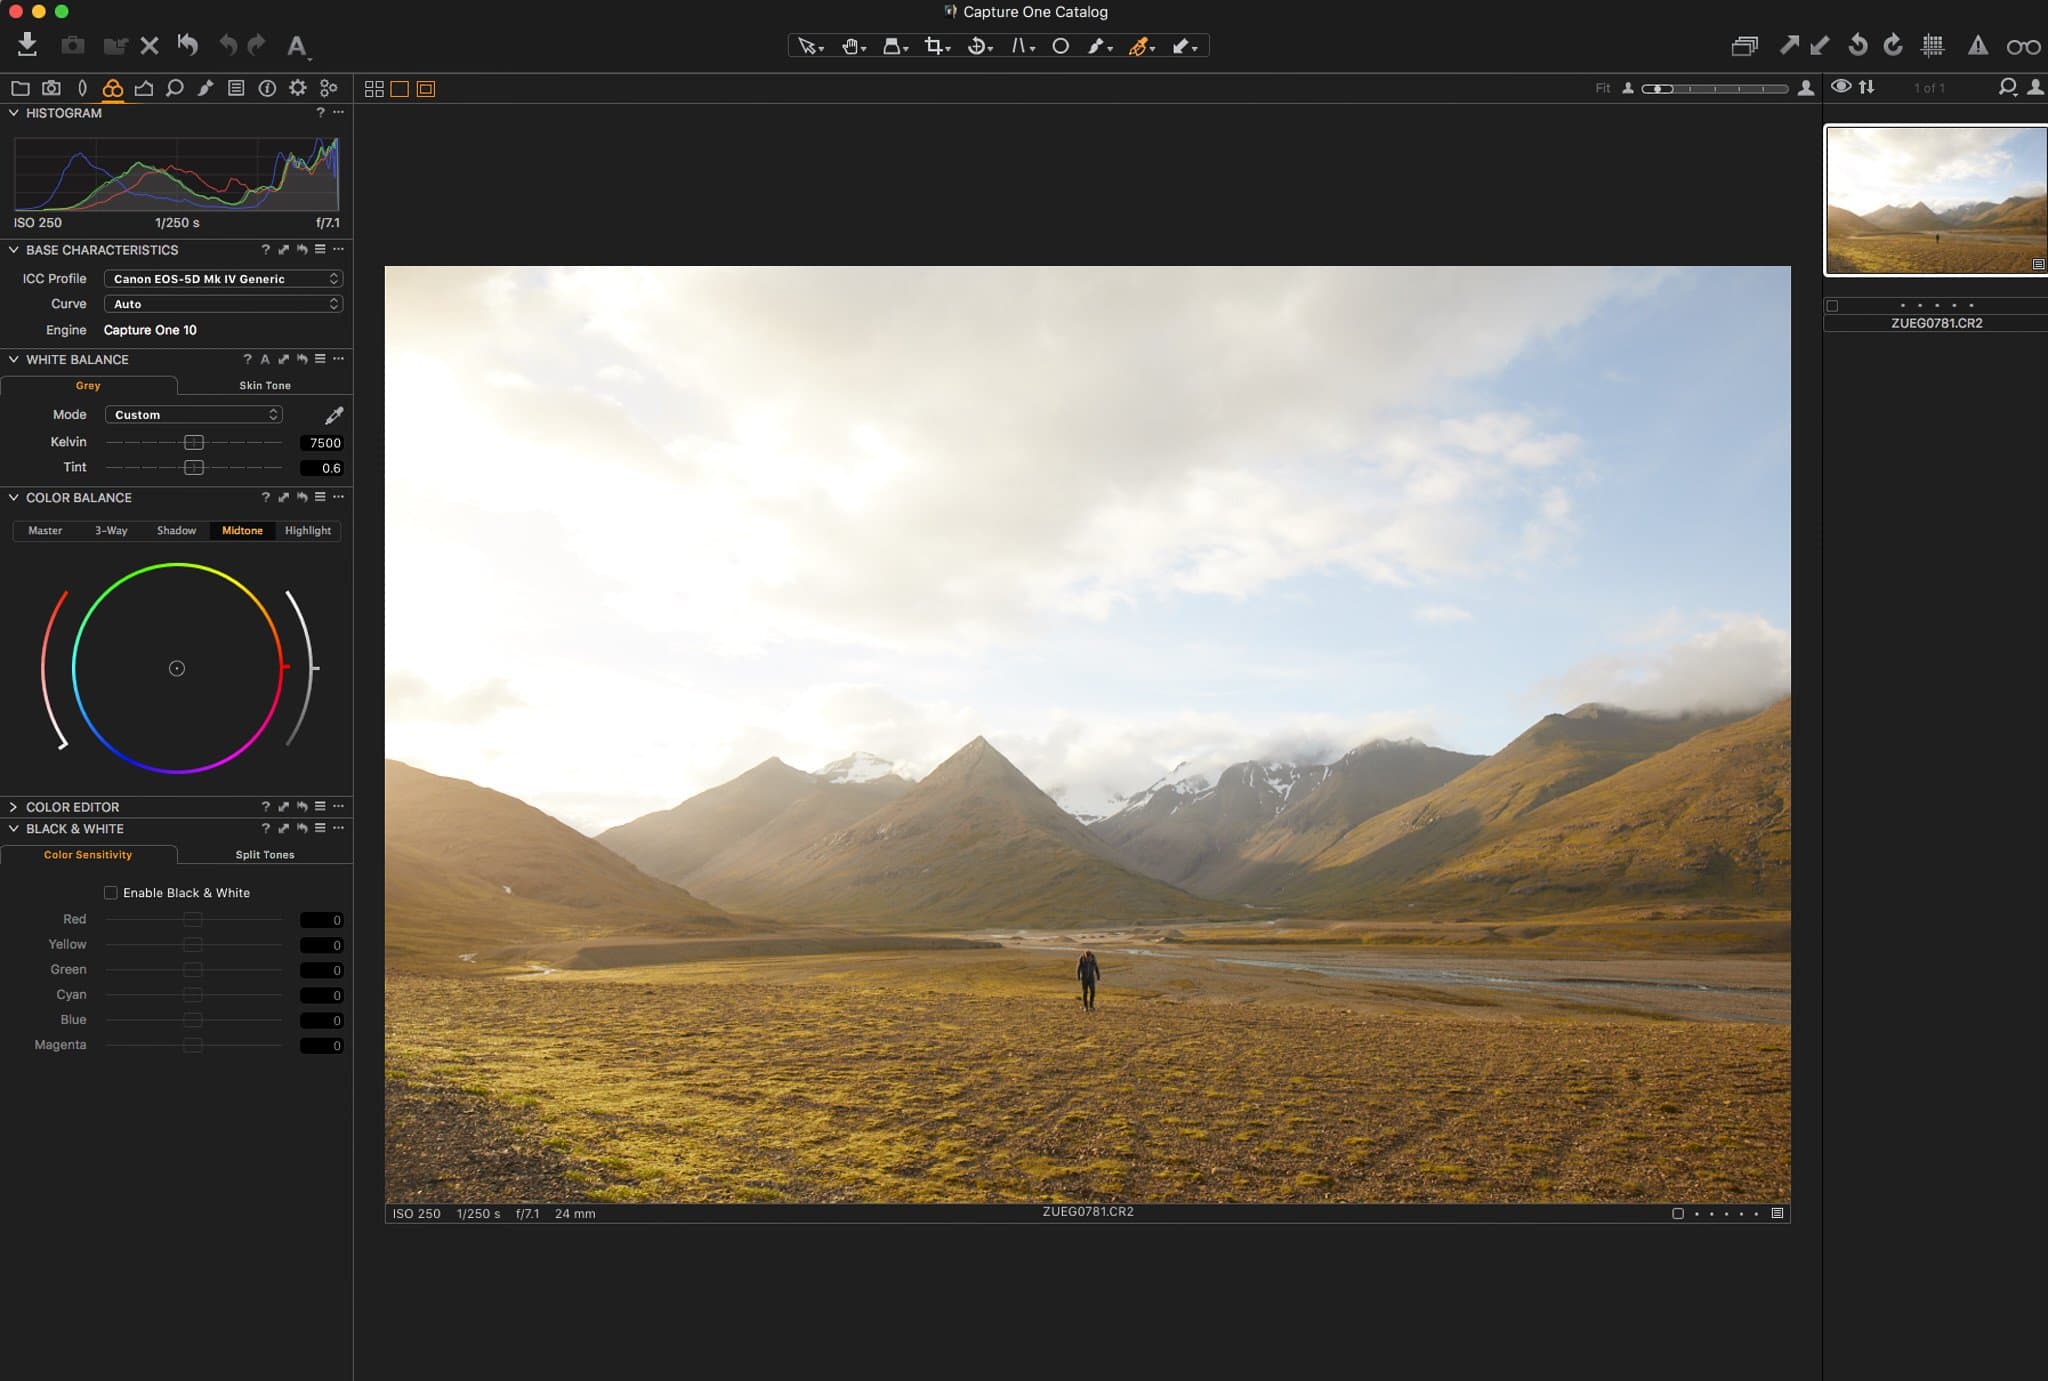
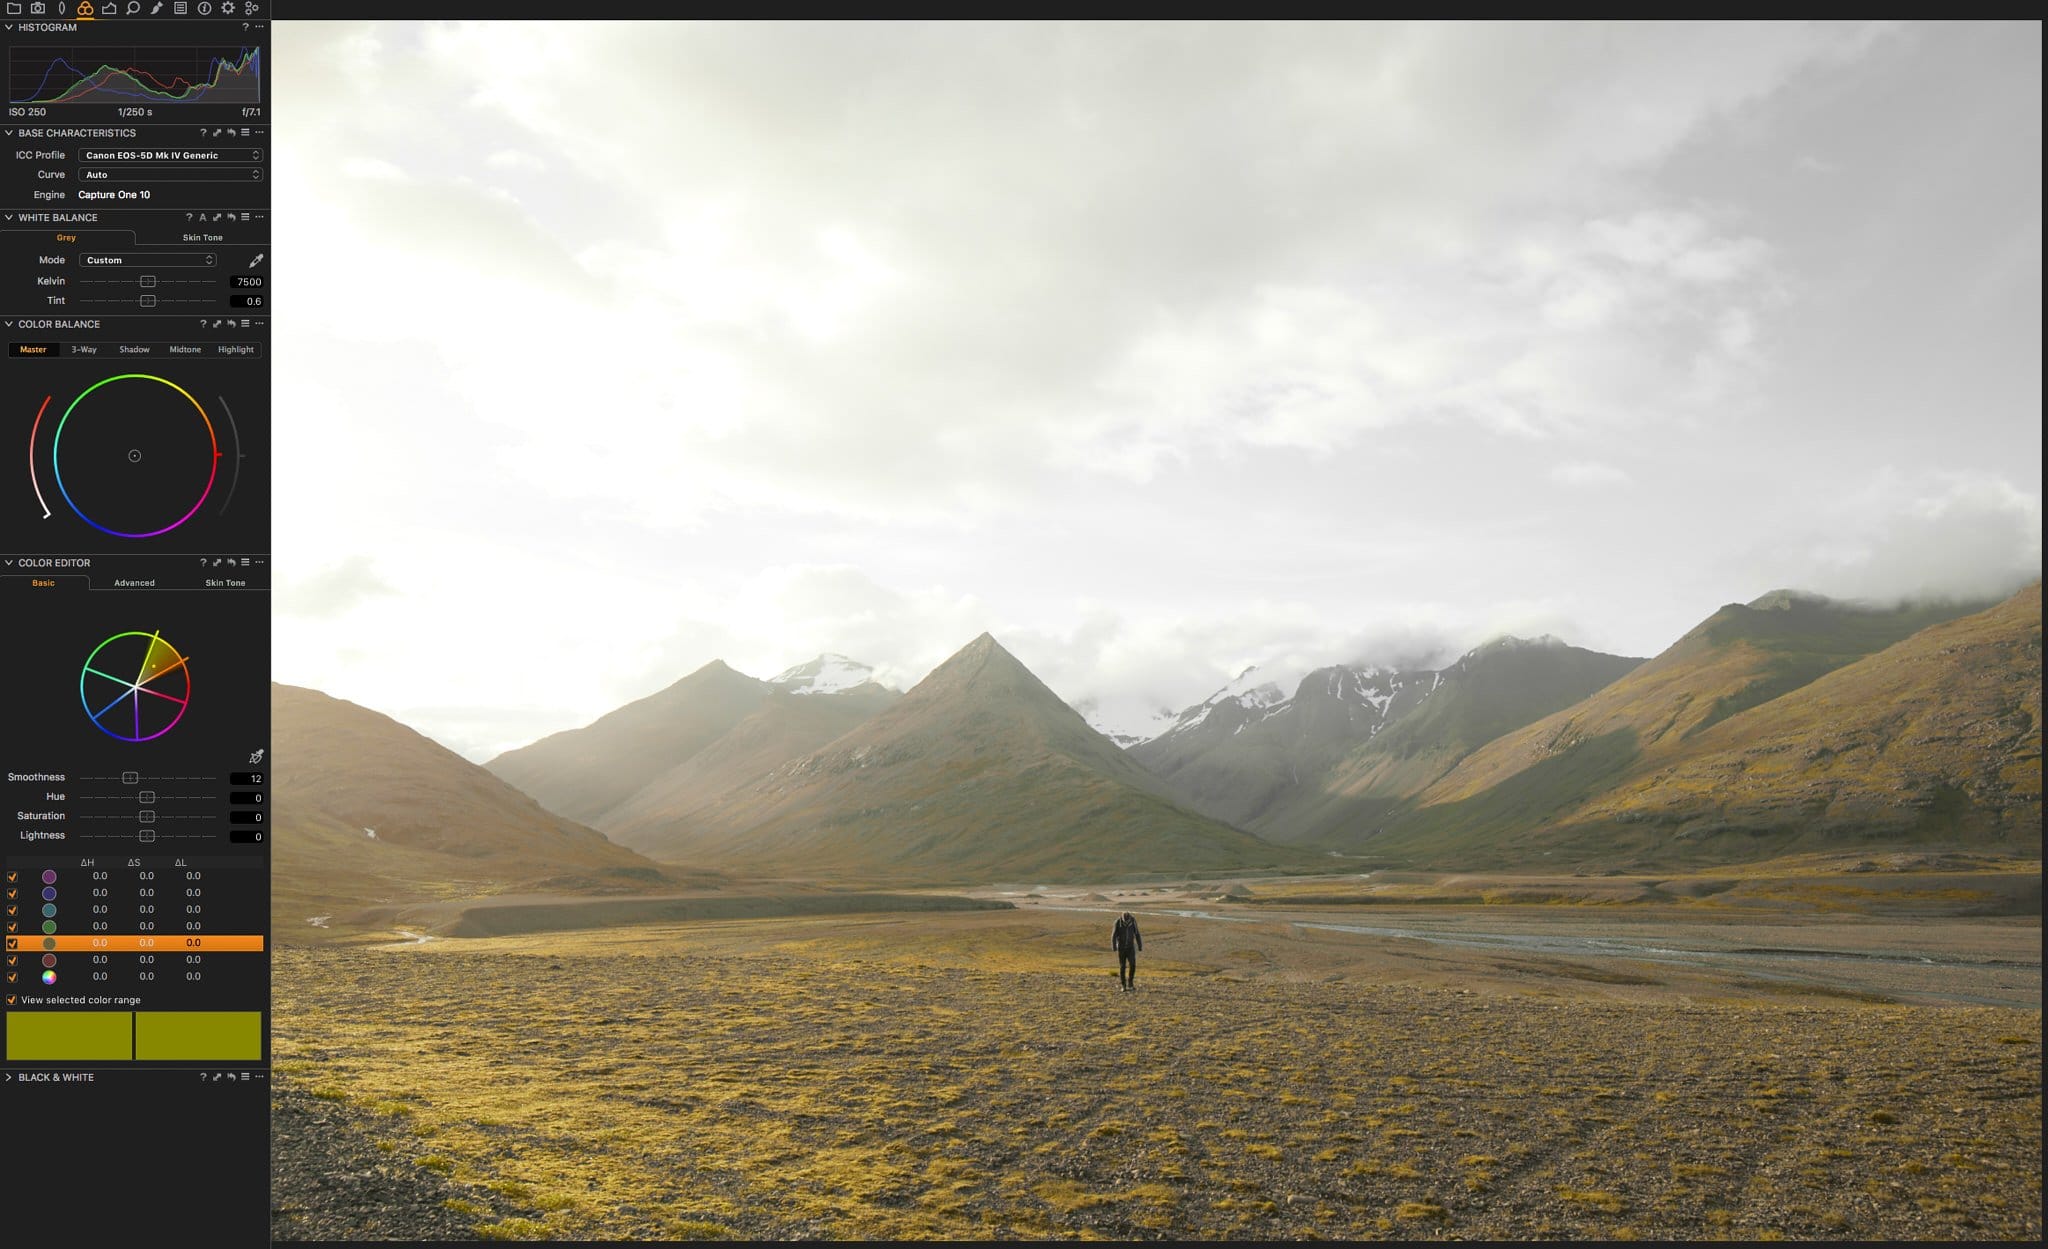
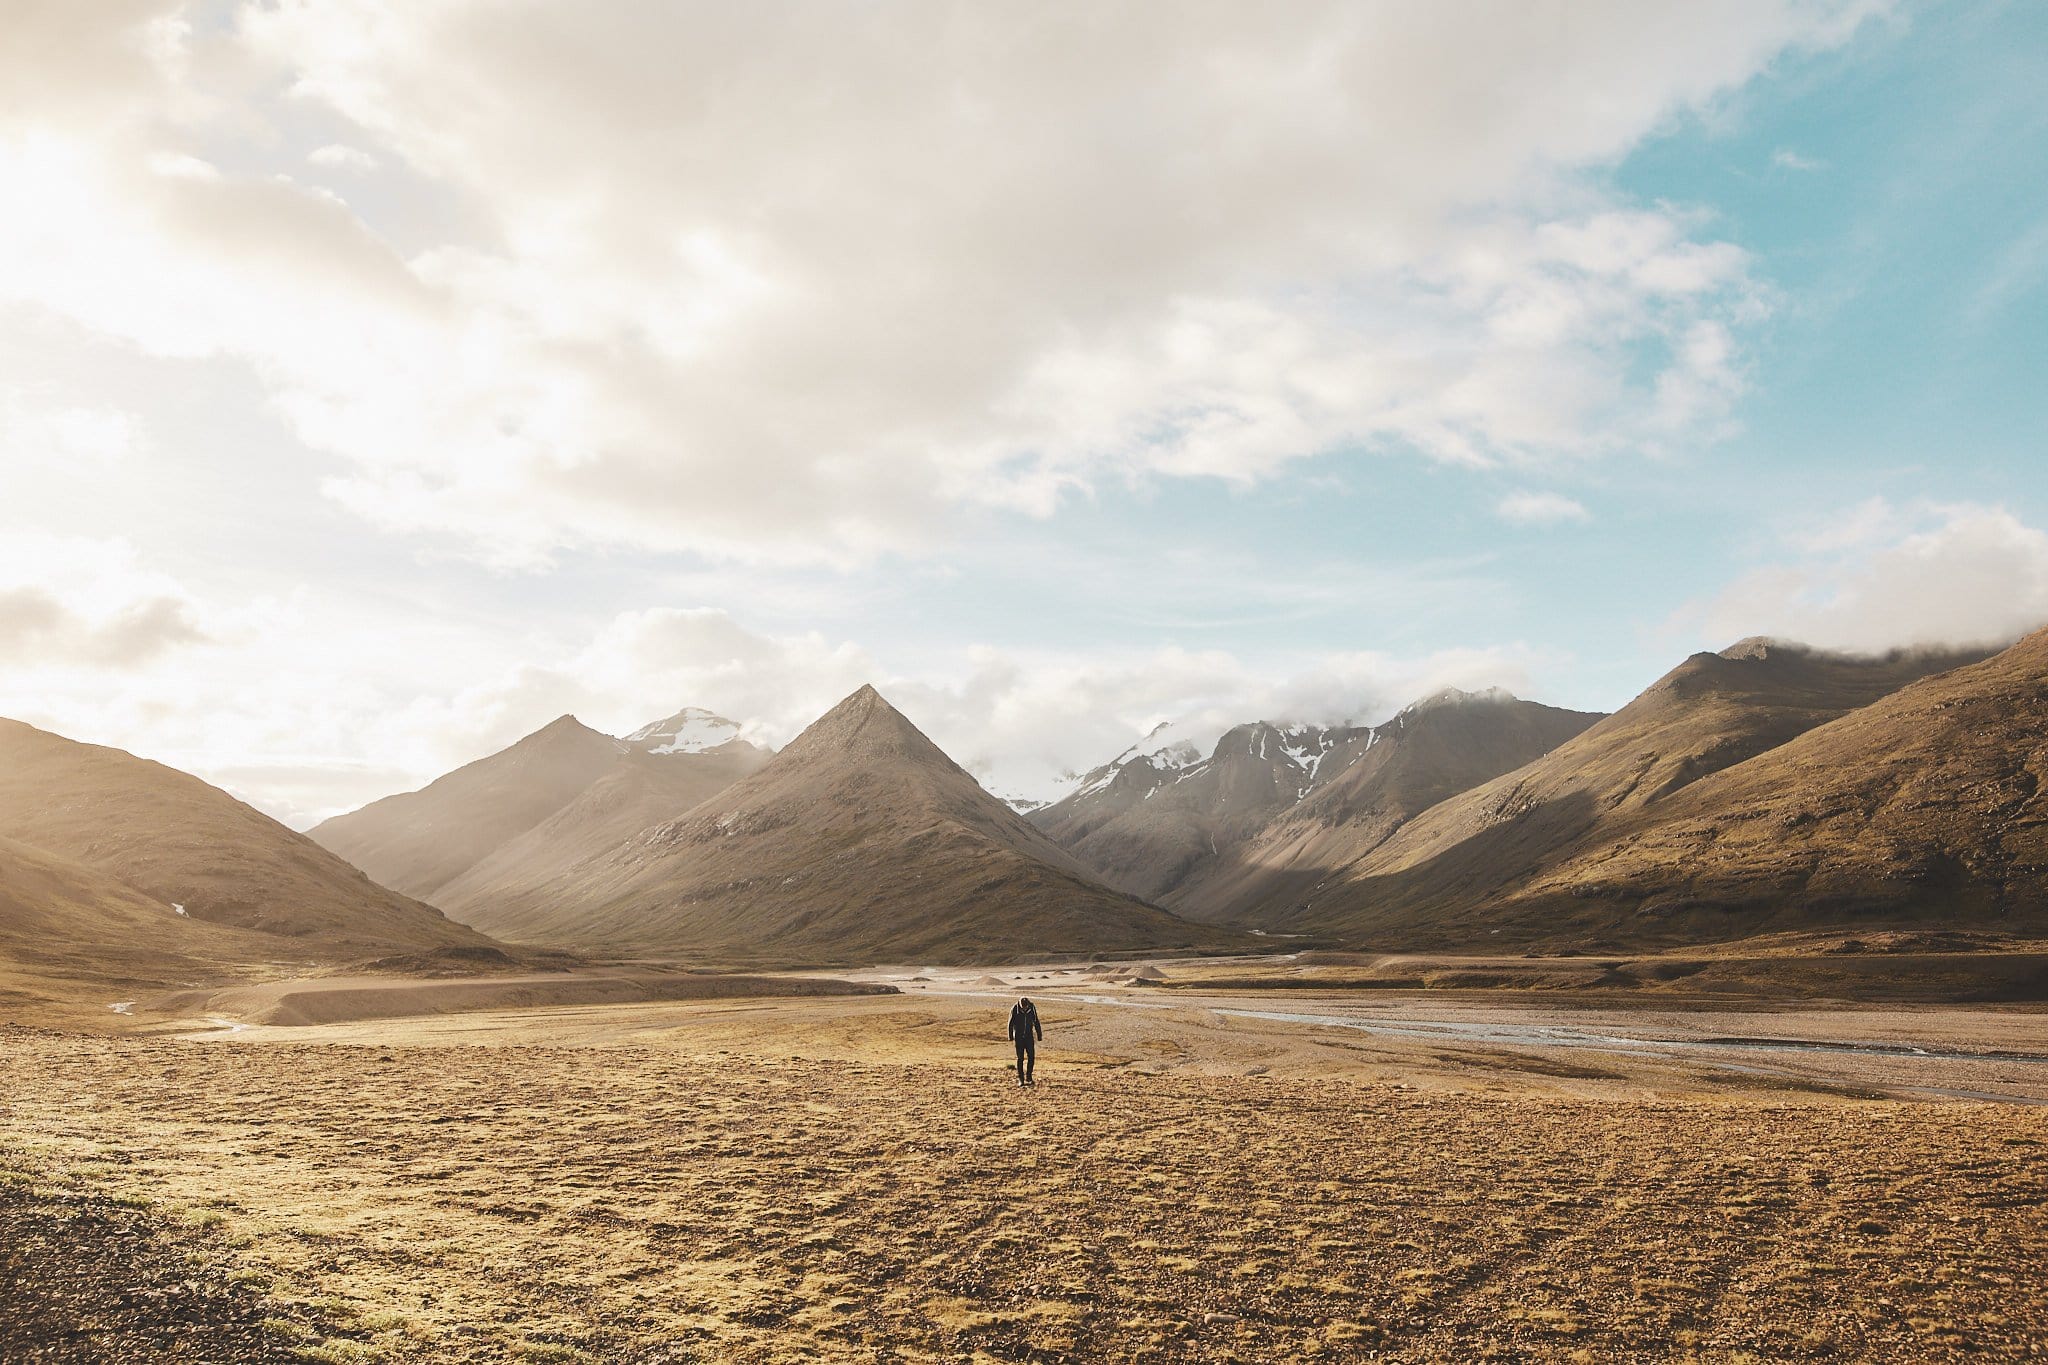
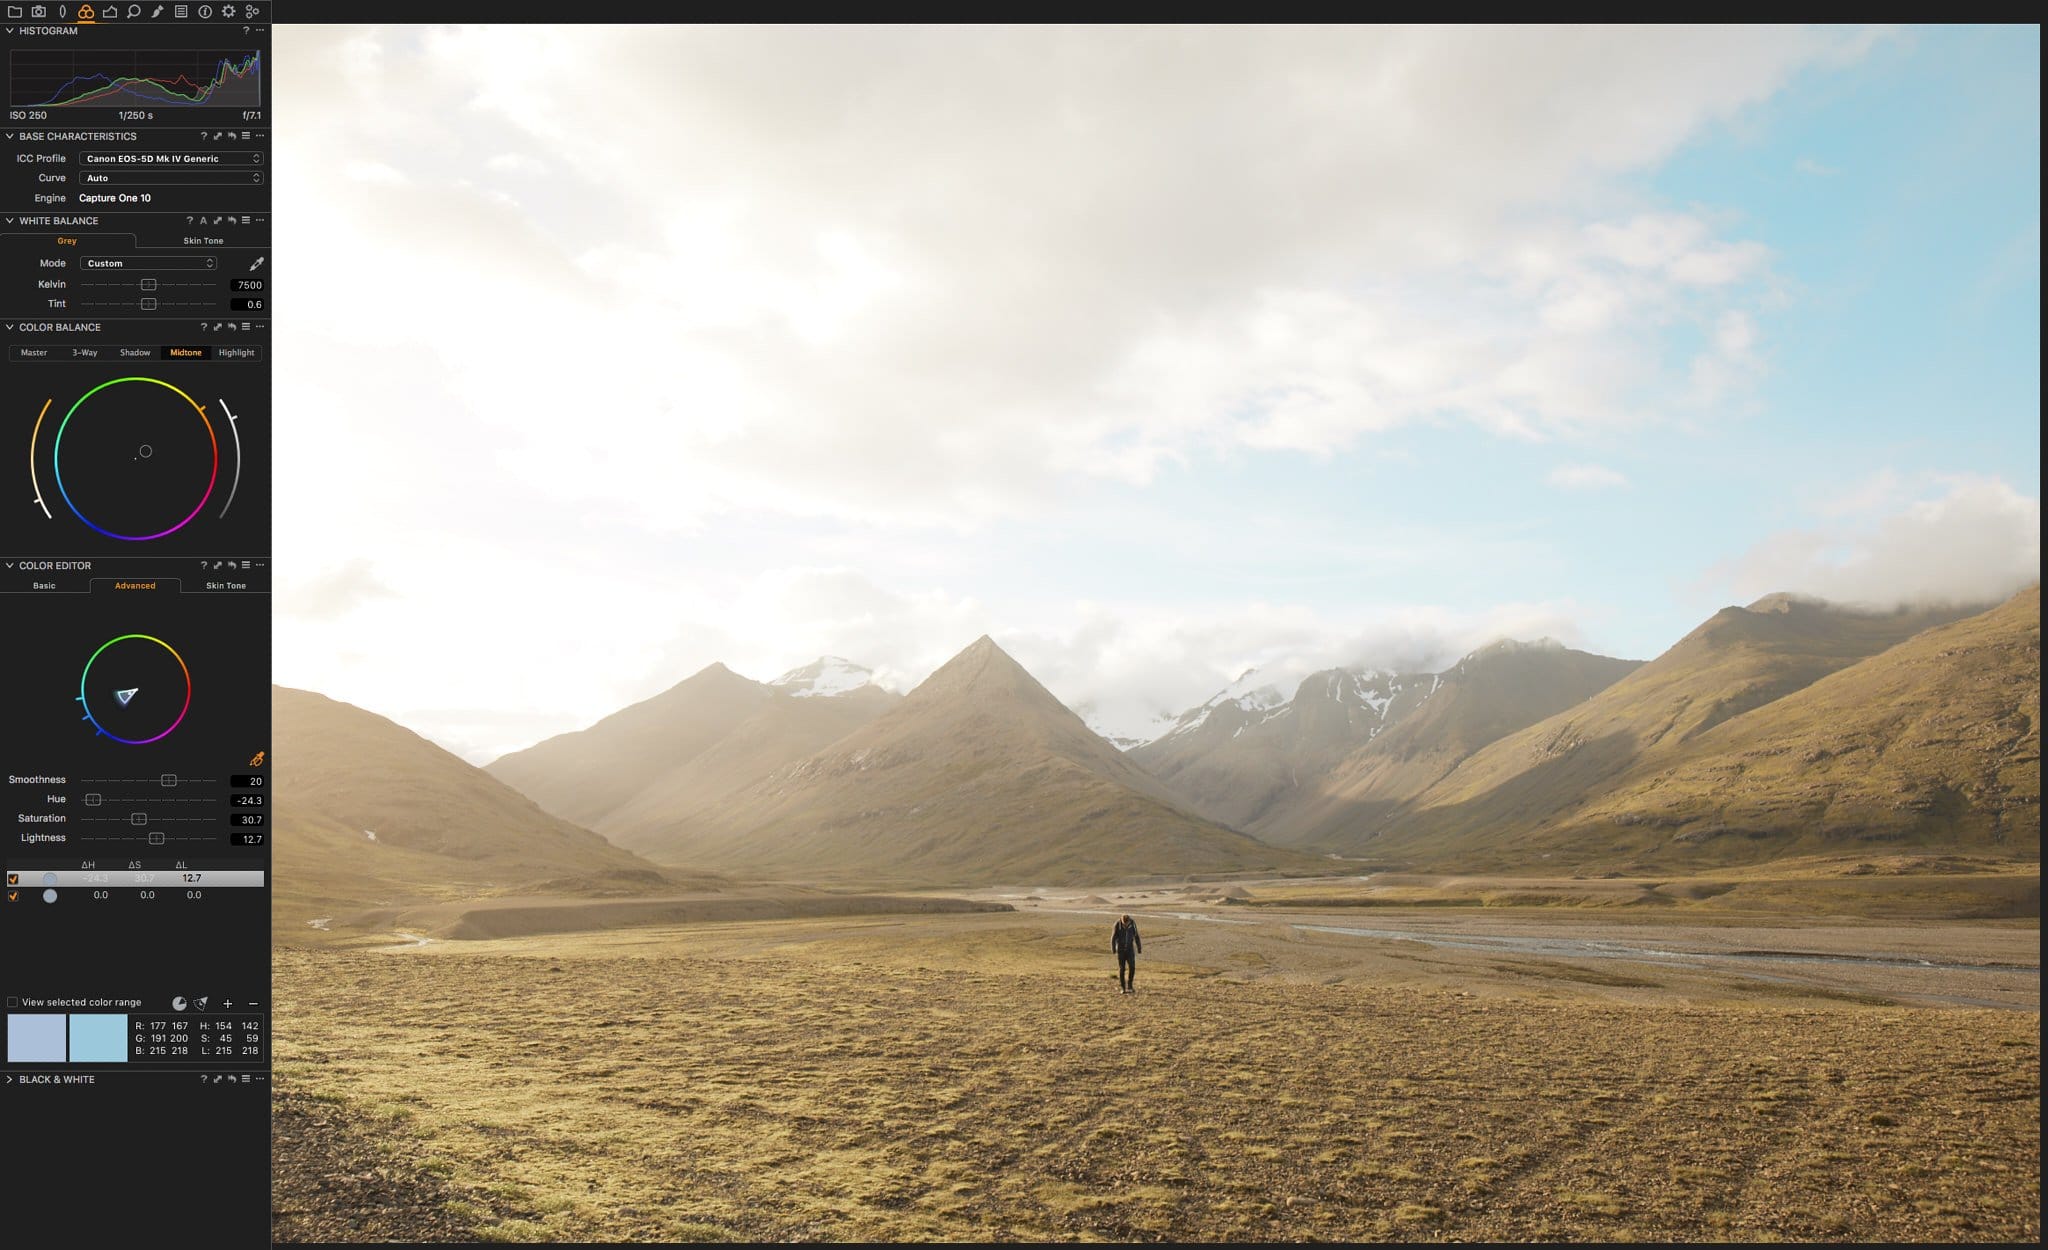
I am using an image I shot on my last Iceland Trip. So I edited this image with my own preset and I want to recreate that look in Capture One. I included the unedited image, so that you can see the whole process. First off I would start by matching the White Balance and here is where I realize the first big difference between Lightroom and Capture One. The tint slider in Lightroom starts from -150 to +150 whereas in Capture One it only ranges from -50 to +50 (but with 0.1 increments). So I set my Kelvin setting to 7500 and the Tint to 0.6. That is fairly close to what it looks like in Lightroom. I would recommend editing on one screen so that you are sure you have the same screen to compare the images (but if you have two perfectly calibrated images, go ahead an edit on two images, it’s of course much more convenient). I switch to the exposure tab and lift up the exposure for the entire image, just to have a good base to work on my colors.
This is our reference image that we want to replicate in Capture One.
Diving into the Color Options of Capture One
Here is where the software truly shines in my opinion. The Color Tab is so much more precise and it might scare you if you are coming from Lightroom. The first thing that went through my mind was that it looks like a color editor from a film editing software. You have the color wheel in the middle where you can pick the color you want. In addition you can use the handle on the circle to be more exact with the color you want. On the left you have a saturation slider and on the right you have a luminosity slider. Now, you have different tabs like the master tab, where you control the overall color or you jump into the 3-Way tab, where it shows you 3 small circles for the shadows, mid tones and the highlights. You can also go to each color wheel individually for shadow, mid tones and highlights. After you setting the color balance I jump into the color editor.
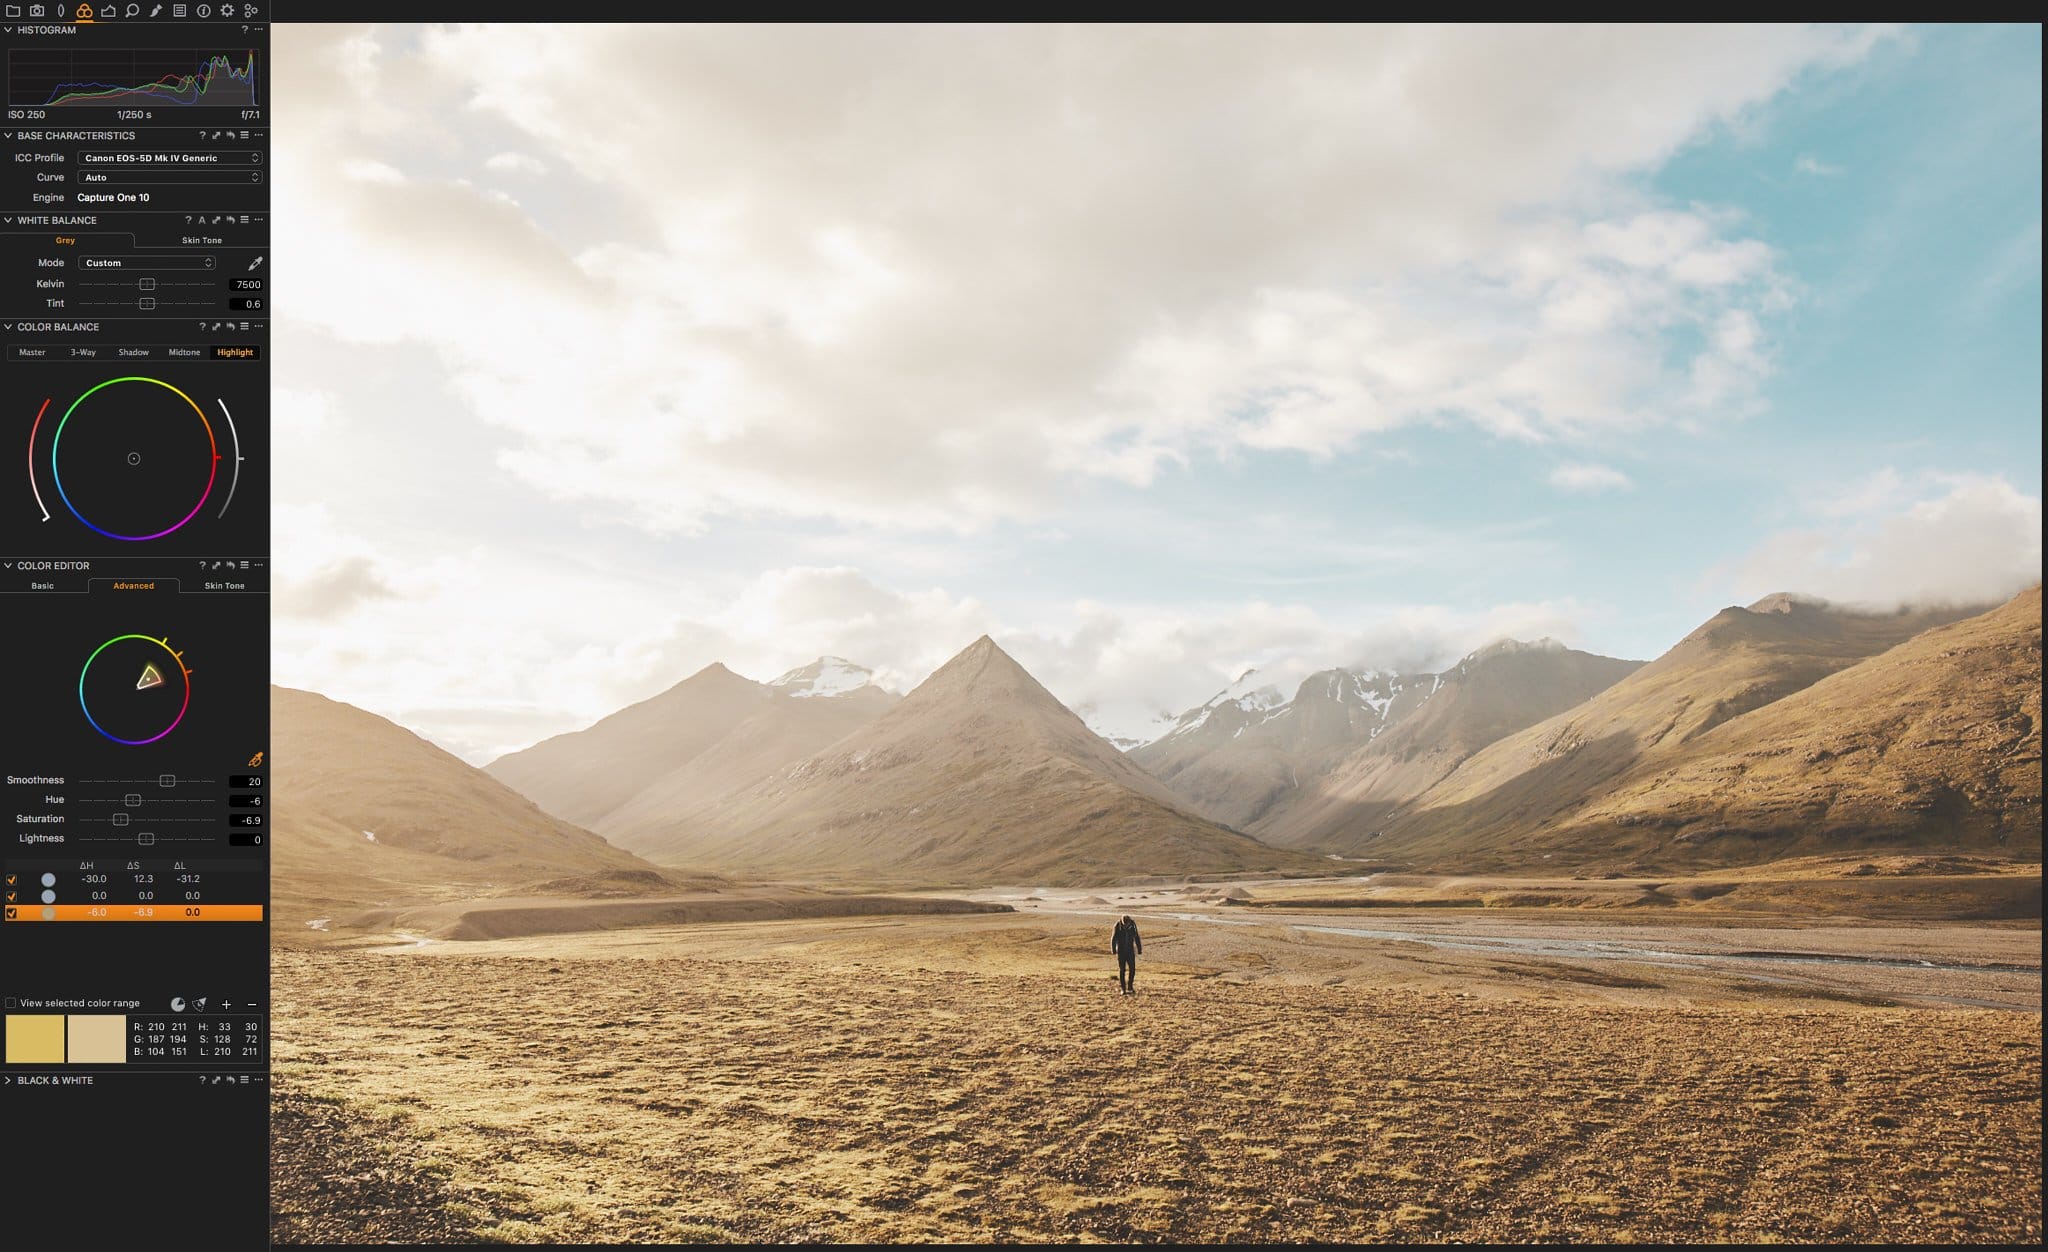
Within the color editor section you will find the basic, advanced & skin-tone-tab. It is basically like the HSL-Section in Lightroom, but with a lot more control over which color you want to change. Going into the advanced tab, I first choose the color picker (the eye dropper icon) to choose the color I want to change. To preview what color will be affected by your changes you can check the “view selected color range”-box. Everything, except the color you choose, will be in black and white now. If you see some areas in your image that should not be affected by the changes, you can narrow down the color space by using the handles on the wheel (either to narrow or broaden the color space) and by adjusting the smoothness slider. Again this way, you have so much more control of your colors in your photo. If you don’t want to be so precise you can jump into the basic tab and adjust your hue, saturation and lightness as you would in light room. But even in the basic tab, you can narrow down the color you want to be affected with the handle on the color wheel. Now the image already looks fairly close to the reference image.
The Exposure Tab
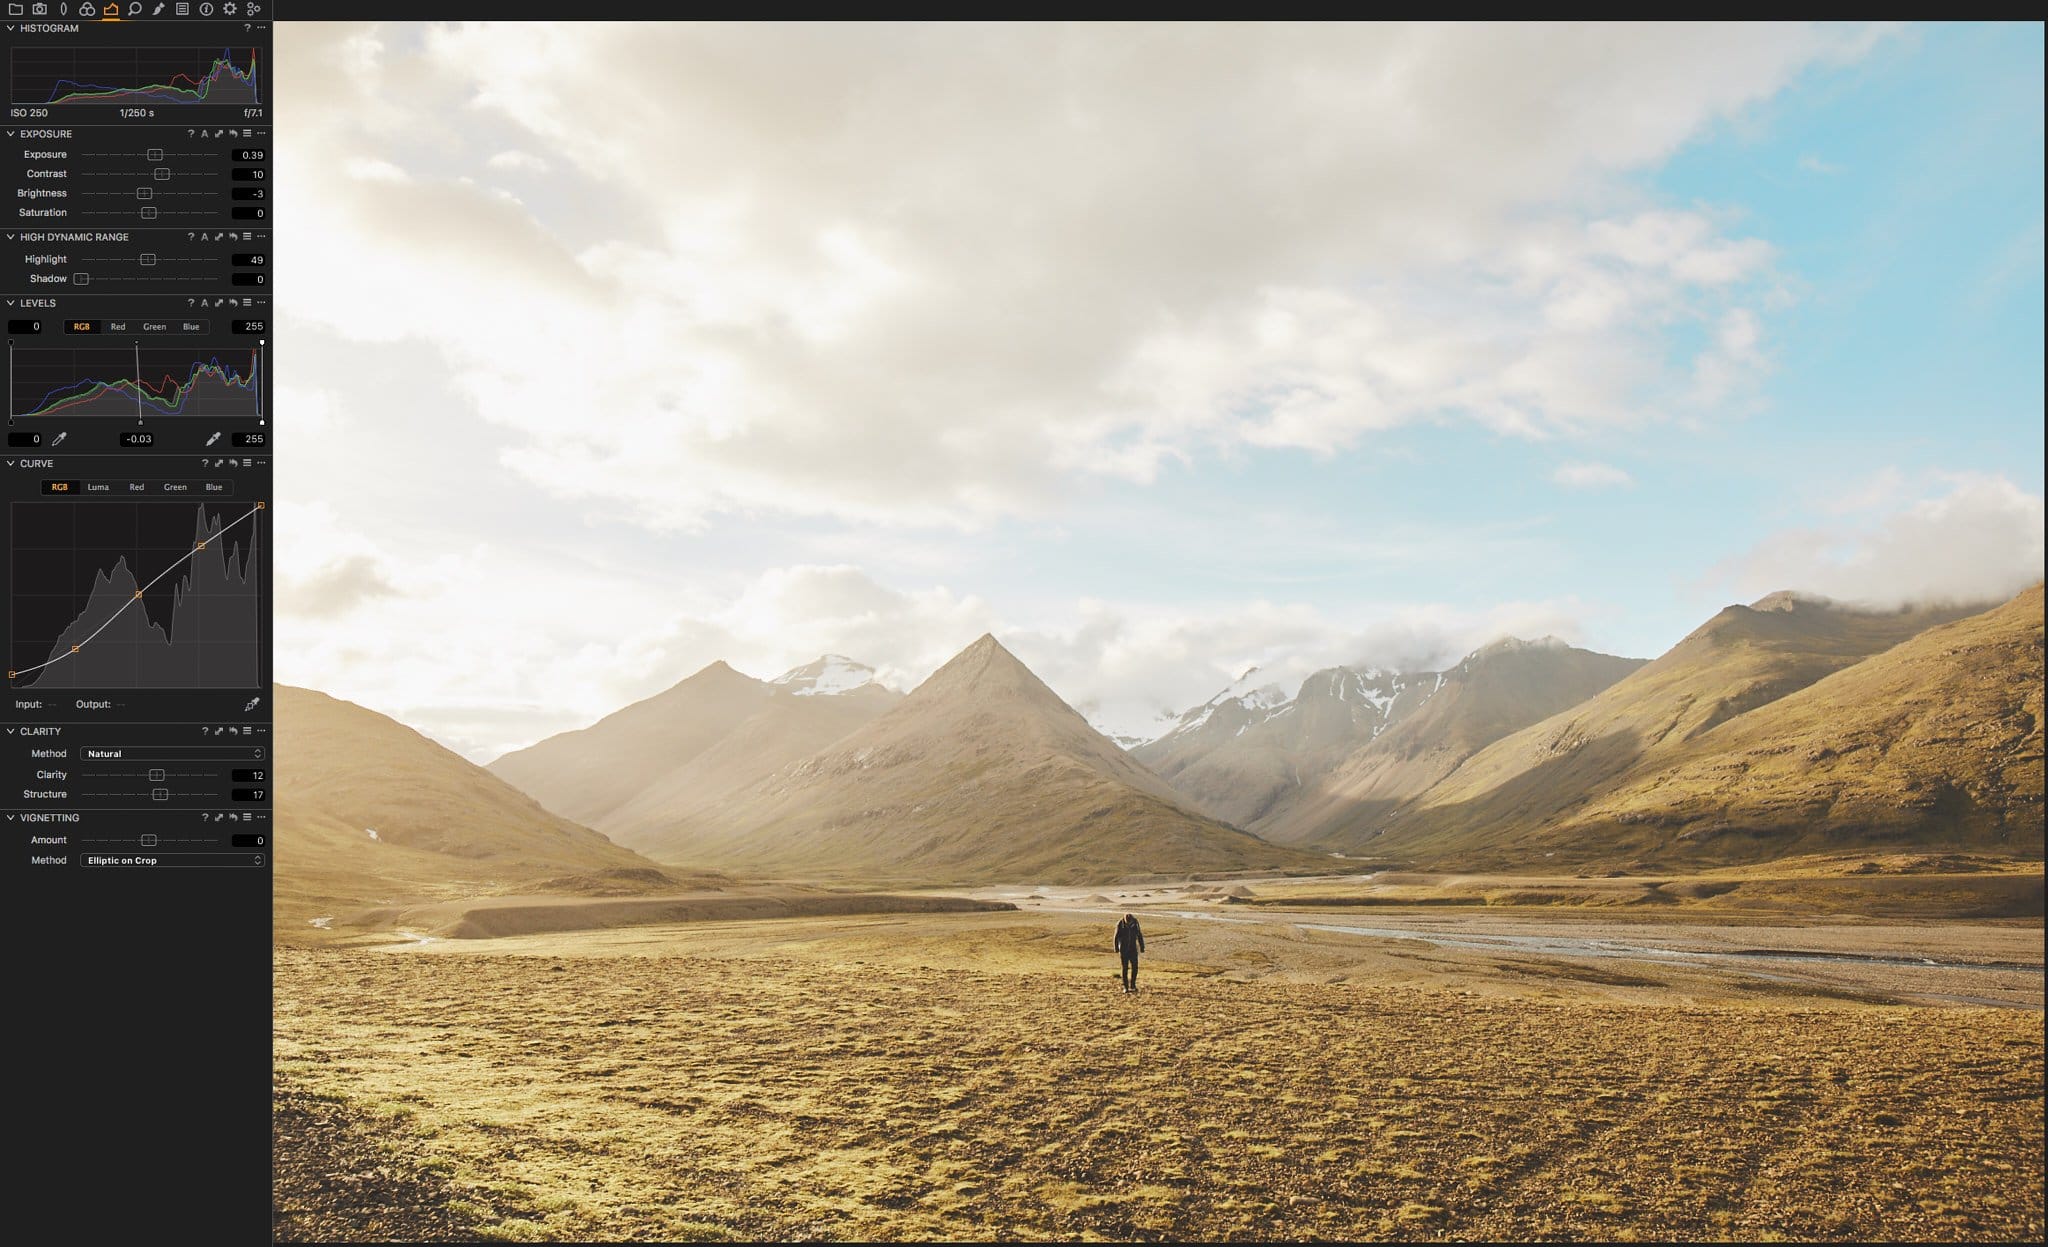
Some of you might think, now why didn’t you start of with the exposure tab? After playing around with Capture One I found that it would suit my workflow much better than the other way around. But that might change in the future. Back to the exposure tab. You will find some similarity to Lightroom here, but what maybe not be clear is where to find the “highlight, shadow, white & black”-sliders from Lightroom. You will find a high dynamic range section, where you can adjust the highlights and shadows. For the “blacks & whites” there is no such slider as far as I know (please correct me if this is wrong). For the “blacks & whites” I would to that in the levels or curve section. For example in the levels section you can pull the point slider to match the histogram. If you are already working with curves, Capture One gives you an additional Luma tab, to adjust the luminosity of the image. I slightly adjusted the point slider for the mid tones in the levels section and shaped an S-Curve in the curve section to match the reference image. Also I pull up the clarity and structure.
Local Adjustments
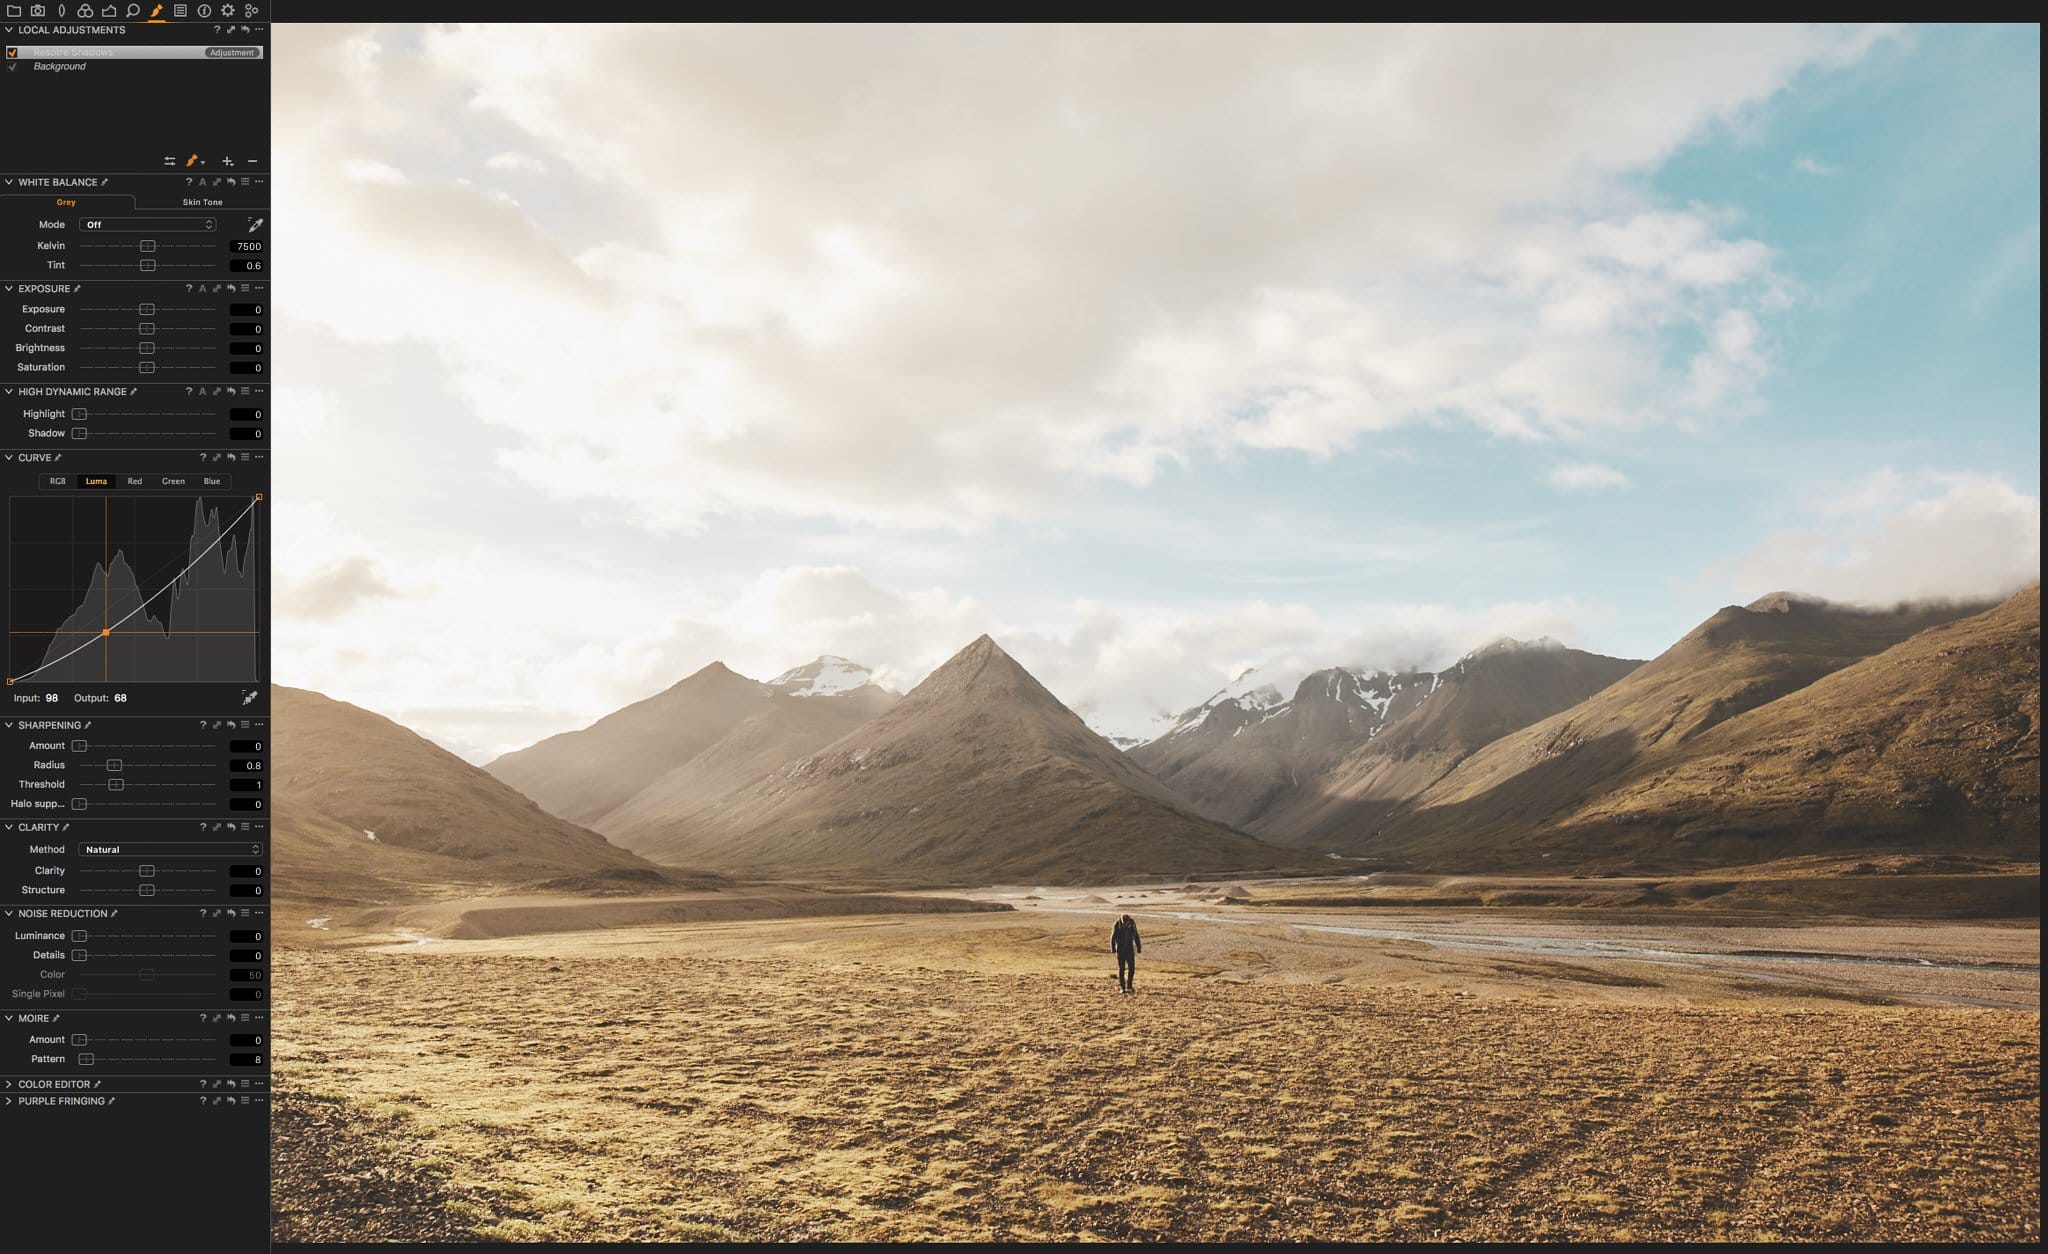
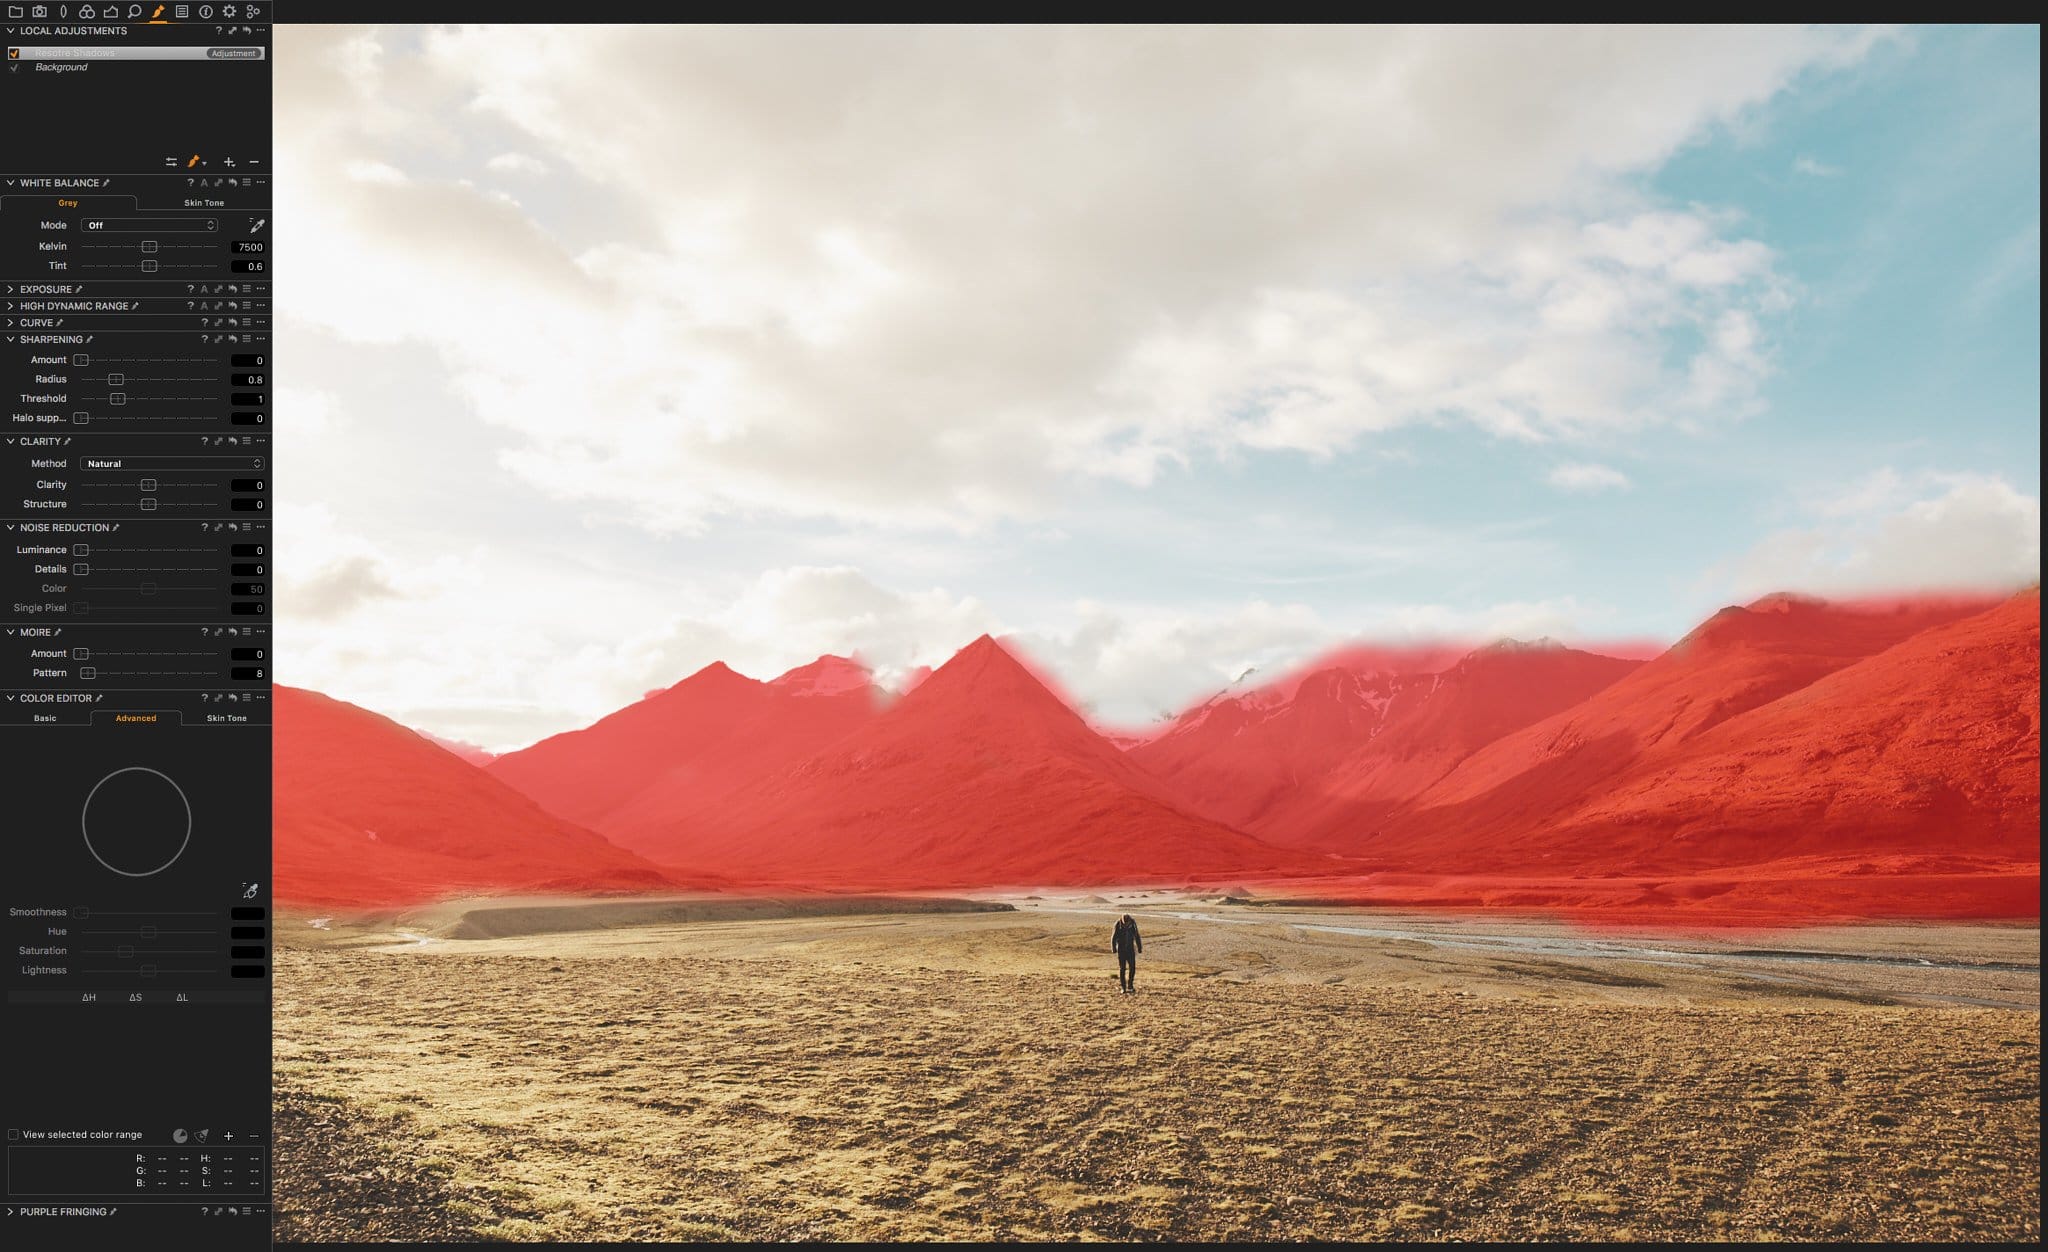
Oh baby! Such a good tab. I learned Photoshop first and I love working with layers. If you are not familiar with the concept of layers let me know, I probably will write an entire blog post about the local adjustment tab in Capture One. For now I will stick to what I have done in this image. I created a new layer by pressing the plus button. Now I paint over every section that I want to be affected by the changes I want to make. With right-click on the image you can change the brush settings (like size, hardness, opacity, flow etc.). Now here is one point I wish it would be more like Lightroom. In Lightroom when you are using the brush you can press & hold alt or option to switch to the erase brush. With Capture One you have to go to the tab and choose the erase brush. Alright, I painted over the mountains and now I want to give them more shadows or add more black. Also I bring the luminosity down a notch.
Conclusion
Congratulations! You made ’till the end. Here is the final image compared with the one I exported from Lightroom. You will see some slight differences in color. But Most of the image could be recreated. I must admit, it took me a while to get familiar with the controls in Capture One. Once I figured everything out, I had to put in some work to recreate my preset in this software. Oh and while we are on the subject of presets, in Capture One they call it Styles. Don’t be confused, there are so-called Presets, but they are using it to save certain settings while Styles are more similar to the presets we know from Lightroom. Overall I takes a lot work working into a new Workflow and I barely scratched to surface with what I showed you. I have to use Capture One for a longer period of time to give my final thoughts on this, but for the first look and feels I like their approach. If you want to be informed when the next blog post is out, than don’t forget to subscribe to the newsletter to be the fist one to be noticed.
PS: Capture One offers a 30-Day trial version of their software.
Above the Lightroom version, down below the Capture One version


